Get Good: Dungeon Defenders Apprentice
If you have yet to try the latest hit from Trendy Entertainment, Dungeon Defenders, I highly recommend it. Since I’m sure many of you just bought the game following the free weekend, and I’m not keen on getting stuck playing with noobs like you, let’s cover some of the basics.
For those of you who haven’t played it yet (for which there is no excuse), Dungeon Defenders is an indie co-op tower defense RPG. Players choose from five different classes each with different play styles to form a rag tag team of people who will inevitably die due to their own incompetence.
Being the awesome guys that they are, Trendy is still releasing plenty of DLC for the game – much of which is free if you already own the game during the event. Being the greedy bastards that they are, you’ll have to pay for the holiday costumes/missions if you want to get them afterwards.*
Picking up the Apprentice
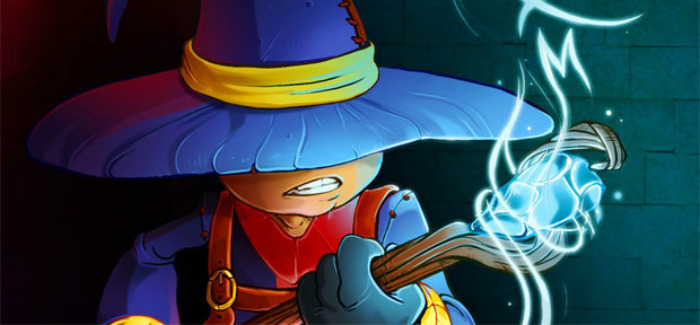
So you’ve booted up the game, and are making your first character (keeping in mind that non-TrendyNet characters won’t be able to play online or trade with other players should you choose to do so, and you can still play solo with an online character). We’re going to focus on the Apprentice (who is definitely not Vivi, not even remotely close) who can place the most damaging traditional style towers, and can do ranged damage with his staff.
Being a total badass, he can also do area damage by charging his attack, or a knockback by using his secondary attack. Since you’re not a hacking god like me who can just send a trojan to all the NPCs and bang their moms repeatedly, you’ll have to pick a focus for your character. You can either focus in hero DPS, or tower DPS. For this guide, we’re going to be playing a tower focused character. We’ll talk more about stats later.
After deciding that you want to play the Apprentice you realize there’s an almost identical character called the Adept. Your head then explodes due to confusion and lack of ability to use Google. Fear not, I’m hear to glue the bloody chunks of what was once your skull back together and keep you in the game. Generally speaking the male version of each character (Apprentice, Squire, Ranger, and Monk) have slightly more health and can do slightly more damage, while the female characters can move slightly faster. Their towers seem to be identical.
Their special abilities are slightly different, as well. The Apprentice’s Overcharge ability can spend 8 mana per second to increase his build, upgrade, and repair speeds (which can be handy when those pesky ogres are about to fuck up your shit). The Adept, on the other hand has an Instant Upgrade where she can spend extra mana (starts at roughly 50% more, but the amount decreases depending on the points you put in the skill and your gear) to instantly upgrade one of your towers (which also fully repairs it). They both have a bomb ability which does a lot of damage to undead. The Apprentice’s version does more damage, while the Adept’s has a larger range. The Adept is technically better (the best kind of better!) for tower builds, but some people pick the Apprentice since he gets all the new costumes, or they just like his look more. At the end of the day, the difference between them is pretty negligible… I’ll just make fun of you. A lot.
Distributing points
After you start up the game, you’ll notice that you’re currently level 0. You can level up to level 1 immediately, and you should do so now. Now as I’m sure you’ve figured out you have to choose which stat to put a point into. And there’s ten whole stats to choose from! At this point you should probably change your pants (they’re filled with shit) and then come back after you’ve calmed down. Your stats are pretty simple. Tower attack damage is by far your most important stat, followed by tower attack rate. These two will end up being maxed. Tower range is also important, but you don’t want to put more than 25-26 points in it total. The remaining points should go into tower health. You shouldn’t put points into any hero stats or ability stats (though you’ll get some from your gear). When it comes to extra stats from gear, tower stats are most important, but player health, player speed, and player cast speed are both quite helpful.
The basic winning strategy
Now we can finally talk about strategy (it only took 800 words to talk about actually playing the game…) First off, you will gain an experience/mana boost if you do not attack at all for an entire map. Since you’re focusing on towers, don’t be an idiot and take advantage of this! There’s also a bonus for maxing out your defense units (more on these later) for an entire wave. You should also turn on hardcore mode before you start the map. This disables respawns if you die during the combat phase, but you gain 50% more experience and mana, and better loot will drop. Finally, you can play through on Medium if you aren’t comfortable with the mechanics,** or you can play through the first level once on Easy and Medium and Hard to level up a bit, and then everything else on Hard. The latter is much more fun, and I won’t tell your friends about how you are a pansy.
So let’s talk about defense units. Each map has a limit on DUs, and each tower has a cost (imagine that!) It is always better to build a new tower than upgrade an existing one. Aside from the experience bonuses for maxing out your defense units, upgrading a tower only has a marginal difference in stats (it basically acts as if you had put slightly more into your tower stats), and you’ll only want to do this after you’ve placed as many towers as possible. The strategy is pretty simple, identify where as many monsters as possible will converge, block it with towers, and then block it with more towers. During the combat phase you should be collecting and spending as much mana as possible. You’ll get 4 chests full of mana after each wave, but it pales in comparison to what drops of monsters, and mana will despawn during the combat phase if it is not collected.
Know your towers
Finally, let’s talk about each of your towers.
- Magic Missile Tower: This is your basic damaging tower. It does solid DPS to a single target, with a high attack rate. It doesn’t have an elemental affinity so no monsters are immune to it. Since you’re a cheap mother fucker and don’t want to give the goblins a chance to survive (you dick) these should make up the bulk of your defenses.
- Fireball Tower: Slower, more powerful, and has a longer range than the Missile tower. They also studied Magikarp and learned how to splash. Only with fire. And it kills things. These are great for taking out groups around Ogres when they come up. Keep in mind that this can not defend a lane by itself (you may be tempted to try on early waves) since fire immunity is very common. You need to pair it with something else.
- Lightning Tower: These probably do the best DPS against groups of any tower. It does a chain lightning attack, and can go through some terrain. Now just in case you can’t figure this shit out, this tower does electric damage (shocking I know), and as such need to be paired with something else. It’s also the only tower that can watch its own back.
- Deadly Striker Tower: At first glance this thing seems pretty fucking amazing. It has a massive range, can attack through anything (walls and floors included), and does huge amounts of damage. The issue is that it uses the same targeting as other towers – it goes after the closest enemy to your crystals. That means that when you’ve got an 100k health Ogre, and a 85 health goblin which is 2 inches closer, it’ll do 9,000 damage to that goblin triggering its massive cooldown. It does prioritize Wyverns and Mages, both of which will fuck you up if not taken out quickly, so it has its uses.
- Magic Barricade: These things rock. Not only do they protect your tower, but anything that hits them will lose its elemental immunity. Since they only cost 1 DU, they can make your Fireball and Lightning towers much more effective. If you have a Squire on your team you should let him place his walls instead, but these do an admirable job at keeping your shit from getting fucked. Don’t place them too close to your towers though or they won’t help much against Al Quida Goblins or Ogres.
At this point you should go forth and conquer! Play by yourself, or with friends. Just make sure you don’t kill your team in the process. Next time we’ll go over the Apprentice’s best friend, the Monk. Until then, happy hunting!
* Note from the girlfriend: The split screen is great for a little couples gaming. It’s much more fun if you’re playing on the same screen. Yeah that’s right, I got Rabid Ferret and you don’t. SUCK IT BITCHES
** (pussy)


I’m a Squire man.
OK, this is bullshit. Why is no one else commenting on this?
Because everyone has forgotten about me in my absence. :(
Hey I’ve read your article =D
but i don’t have the game and don’t have the money to buy it right now =(
[…] count in the contest this month, we know you probably have lots to say about other subjects like Dungeon Defenders, Xiant’s new design series, or Mass Effect 3. Don’t be shy, let us know what’s […]
This was exactly the article I was looking for. Thanks :)
Glad you enjoyed it!
read dis thing, looked for thumbs down button