Battlefield 3 multiplayer strategy: Operation Metro Part 2
The beta’s over and done with, and anyone that’s played it is probably done with Metro for a long time to come. As for myself, I want to go back to it first when the retail version comes out and see what’s new.
The strategies here and in my last article may not be useful before Battlefield 3 launches, but I’m fairly sure any changes in the final version won’t be grand in scope. For this reason and because I have a promise to keep, here’s how I play the last two bases on Metro. When the full game drops, it’s my hope that you’ll return here once or twice to rediscover how to win.
Ticket, please!
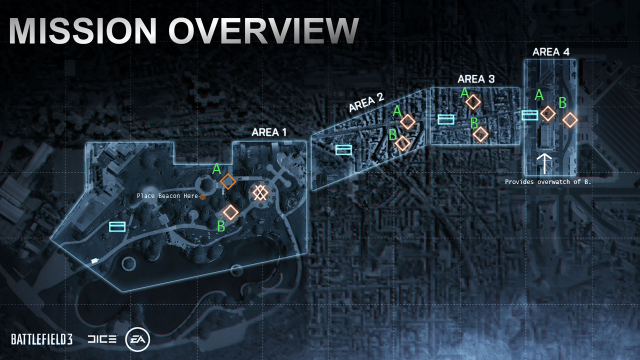
With the train station behind you, now come the ticket booths. The most important MCOM here, in contrast to the second base, is B. While neither crate is any farther from the enemy’s spawn, the one route to A provides more cover and is quicker to travel than to B. It’s also not a choke point. The locker room hallway to B is a deathtrap no matter how you slice it, but there are ways to weaken the defense.
The first and easiest way is, of course, speed, as discussed earlier. If you and the rest of the team don’t dawdle in the new spawn and instead rush straight down the defense’s new gullet, you just might set up at the end of the locker room tunnel, cutting off their easiest path to victory. The timing of this is crucial, given the battle area timer.
If you do it right, there should be about one second left before the game kills you, and by that point only the best, most coordinated defenses will have put up their wall of bullets. Take just ten or twenty seconds too long, and expect to see no less than four or five defenders stacked at the end or in the hallway near the end of the tunnel. Expect as well to have a few in the central ticket booth, one or two prone watching the escalators, and, if this is PC, a couple watching A on your left side.
If what I described above happens, the first instinct is to go to A and hope that pries some bodies from the Doom Hall in an effort to defuse. This is folly. While some defenders probably will peal off, but it won’t be those same bodies guarding B. Ideally, for the defense, the guys in the central room and those nearest A will work on defusing, as if it’s armed, there are likely a few attackers watching the crossways between defending spawn and their objective. If A falls first, twelve to sixteen players now stand between your team and progress.
Making a B-Line
So how to take B without the advantage of speed? There are two methods I find effective.
First is clearance by explosives. Make sure there are a few engineers on your side, or take the role yourself. Shoot every rocket you have down the hall, clearing, only temporarily, the path you want. Even if it takes a few lives, if your teammates are slightly intelligent, one or two others will take the hint and start following your lead. A constant wall of boom booms is as good a deterrent as any from defending a hallway. Keep in mind that the defenders can do this as well, and if the attackers group up at the end of the hallway, there’s free multikills up for the taking. Only some of that wall is destructible.
The better way, I think, is to flank around the backside of the Doom Hall defense. Go just to the left of the entrance to the hall towards the turnstiles. There’s a risk of return fire, but there is a stack of cinderblocks to hide behind as you move, and a door that takes you right behind the MCOM. A few defenders always like to hide there to reload and heal up, so use their lack of preparation to take them out. Duck behind some lockers and wait for some or all your squad to spawn on you.
Even three guys, including yourself, is good enough to slide a wedge in the defense here. Play the spawn role or place a radio beacon if you feel the MCOM is a given at this point, or arm it your damn self if no one else seems like they have the balls to do it. When B falls, A is almost a given.
The hell is that bright thing in the sky?
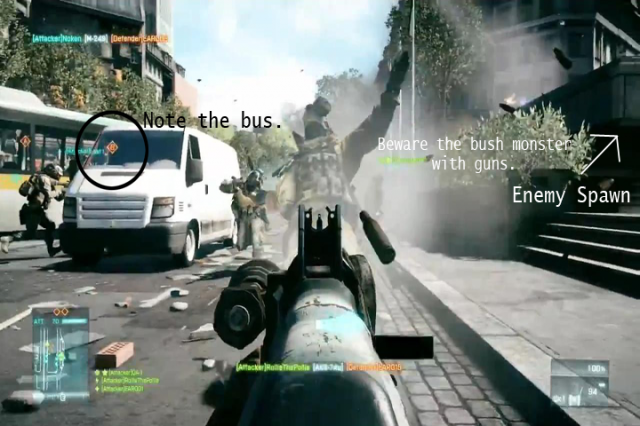
Here's a glimpse...
With the third base taken, you have two more barriers blocking victory. The first is easily breached. The three exits from the train station all offer good hiding spots for campers to pick off your team as they go into the sunlight. While speed is still essential, this fourth base is more forgiving, and taking a minute or two to clean the road out is fine. This done, your first objective is to secure the two buildings facing the enemy spawn. Like any aggressive attack, taking them involves risk, and at least half the defending team usually pitches tents in both buildings, watching and waiting for the attackers to come out to play.
Disregard your safety for a moment and move as fast as you can into the stairwells. The left building that holds A is more important, but holding both is best. In clearing the nest of rats, I don’t suggest too much ADSing. Hip-fire is your friend here, as quarters are too close for precision to be necessary. If you get lucky, cleaning the buildings offers some free dog tags. Don’t hesitate to take them; morale is always an important thing to break.
As with the third base, B is the prime target, for a much more clear-cut reason. It is a second’s sprint away from the defender spawn. Here is where speed comes in, tired as my saying that must be getting. With even cursory control over the buildings, jump down and rush B. Use the hedges and bus for cover, dive to prone and arm, much like with the first base at A. If you don’t die, sit in the bus and listen for the beeps and vocal queues of the enemy. Take them out as they try to disarm. Ideally, some of your team will have moved up, but this is an MCOM that takes one man, if it comes to that. The A crate is a cinch if you have B, since it forces the defenders to cross a fire wall to defuse. If A falls first, expect a fight for B, with a lot of camping on at least one side.
Video Violence is Also Available
Lastly, I have a few videos saved up with quick tips on how to play Battlefield, and I think most FPS’s, successfully. Each video is only a minute or less. Do you want to see them? Leave a comment below so I can get a sense of what you guys want. I aim to please!







Xiant,
Moar strategy plz.
Thx,
iowacrusader
I’ll put the finishing touches on those vids then.
I’m in yoor metro, killin yoor doods.
HEY XIANT. I FOUND OUT A WAY TO KILL EVERYONE IN BATTLEFIELD WITHOUT HAX. It’s pretty Gruesome.
http://www.youtube.com/watch?v=rzkfNw2ETMI&feature=youtube_gdata_player
Where did you post your strategy videos?
All strategy videos are posted to the official Toptiertactics YouTube channel. It might look like Wing’s alternate channel right now, but maybe we can change that. Either way, the videos he mentioned are Tips from Clips:
http://www.youtube.com/watch?v=TQv2BgK0sV0&list=PLLjyoMXcBXhRQVzXuCzfB04L7xQxb6ut-
Good Metro strategy guides though, short but very descriptive with tips you can add immediately…